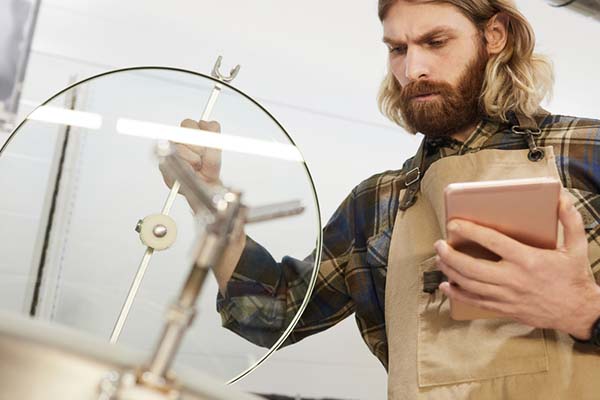
How long has it been since you’ve made your last brew of beer?
Are your brew pot, carboys, wort pump, and wort chiller all stained?
Are they not quite polished enough for another brewing?
If that’s a yes – then you need to start cleaning – and sanitizing!
You see…
The most common enemy in the world of the brewing process is dirt and microbes. And the number one thing a new brewer needs to master is sanitation and cleaning.
In brewing…
A clean brewing system means a flavorsome beer – and it’s a must to put yeast in a clean and healthy environment during brewing.
Without proper cleaning techniques…
…you may risk getting your beer infected, and any germs and dirt will likely lead to undesirable results and effects.
Thus, you must remove these germs from anything that will come in contact with the beer – after all – a clean beer is a quality beer!
Unfortunately…
Many brewers make the same common mistakes in cleaning their homebrew equipment.
However…
It’s not difficult to keep your homebrew equipment clean, and it only takes common sense to master the art of cleaning and sanitation.
So, here’s what you need to do…
Keep scrolling to learn more! about how to sanitize brewing equipment
Always start with a good cleaning

If you’re a clean freak…
You would agree that cleaning always comes first before sanitizing.
Cleaning removes soil, dirt, and other visible stains in the equipment. And, everything used for brewing must be impeccably clean and free from grease or dust.
But…
You can’t do that with just water – you need an excellent cleaning agent!
Get a good cleaning agent
For cleaning, a few products are best for this type of job.
Mild dish detergents and ordinary dish soaps may be suitable and effective cleaners since they are non-toxic.
So…
Ensure that the ordinary dish soap you’re using is unscented and free from dyes. They can remove grease from the equipment, but you might find residue after using dish detergents or soap. Thus, rinse your equipment thoroughly.
Moreover…
Other homebrewers don’t really recommend using dish soaps because they contain oil and fragrance.
Oils can heavily impact the beer’s head retention, and the soap fragrance may affect the beer’s overall flavor and aroma.
But…
For light duties of cleaning, this, however, can be used.
On the other hand, other cleaners might appeal to you!
Brew Cleaner is a cleaner made specifically for brewing, and I recommend PBW (Powdered Brewery Wash). PBW is a powdered solution mixed with hot or warm water – and it’s an excellent detergent for different types of cleaning!
Not only that…
PBW is one of the favorite brewing cleaners since it effectively removes stubborn stains in hard-to-reach places.
There are cheaper options, like…
Oxiclean – a very effective cleaning agent widely used by homebrewers, and it’s an oxygen-based cleaner.
When it comes to price, it’s surprisingly cheap and highly effective – and it’s really worth using.
Furthermore…
One-Step No-rinse Cleaner is a no-rinse and environmentally friendly cleaner used in homebrewing. One-Step has the power of two – you can do both clean and sanitize using this cleaner.
Hydrogen peroxide is another excellent replacement, and this works similarly to No-Rinse Cleanser. You’ll want to make sure the peroxide grade is 3 percent or above.
This is available at most pharmacy shops. Plus, there’s no need to combine this with anything.

Is Bleach/ Chlorine safe to use?
Good news for you!
Homebrewers have used bleach solution and chlorine for a long time. It’s a good glass cleaner but must be limited to plastic equipment.
However…
Chlorine bleached can be absorbed by the plastic and may lead to off-flavors in your beer.
That’s why…
…other brewers avoid using it since chlorine requires a lot of strength for rinsing and may cause corrosion in metals. Also, it may leave stains on your shirt.
Clean everything that will touch your beer
Everything must be spotlessly clean because you don’t want dirt to ruin the flavor of your beer.
Clean the area. It’s important to clean the environment where you will brew, and it includes the sinks, the floors, cupboards, and – everything.
Dishwashing soaps or detergents are the ideal cleaning products for plastic equipment.

As previously mentioned…
Avoid using scented detergents or soap. Bleach can also be useful but may leave a strong odor, and it’s recommended to use a soft cloth or sponge on plastic types of equipment.
Pay attention when cleaning plastic items. Avoid scouring pads or other cleaning materials that may leave scratches on the surface.
It’s ideal for microbes and bacteria to hide under those little scratches – so scrub lightly.
Clean the glasses. In cleaning bottles and carboys, it’s recommended to use carboys and a bottle brush to reach the insides and clean effectively.
Clean the Stainless steel and Aluminum. Mild detergents and percarbonate-based cleaners such as Oxiclean and PBW are best for cleaning stainless and aluminum materials.
What are the things you need to clean?
Anything that touches your beer – fermenter, airlock, hoses, spoons, kettles, testing equipment, and so on.
Other things to remember…
Clean often. It’s important to clean everything before and after using the equipment and tools. The longer you wait to clean – the harder it will be for it to be cleaned.
Don’t waste time and practice cleaning as soon as possible. You don’t want your first beer or next batch of beer to be put to waste because of not being able to clean, right?
Use hot water. When cleaning, hot water is a good idea to kill germs, remove dirt, and make cleaning easier.
Use scrub pads and brushes. It’s tempting just to hose out some equipment.
But…
This is a mistake you don’t want to do or repeat. You’re exposing your beer to bacterial infection that will affect its quality.
There are two methods of cleaning your equipment: One is to use a cleaning solution and scrub your equipment, which may take less time. The second one is soaking.
Soak for 20 minutes

Soak your equipment. This is the second method of cleaning. Soak your equipment in a cleaning solution. Follow the direction on the package that tells you how much to add. And for about 20 minutes, leave it before rinsing thoroughly.
However…
Some brewers use the combination of the two methods. First, they soak and then scrub the equipment to get rid of the dirt and residue.
But, what if you can’t scrub hoses and airlocks?
For this, you need a good cleaning chemical to make sure that the hoses and airlocks are cleaned.
You also need patience.
But since these pieces of equipment are cheap, you can change them from time to time.
Always sanitize equipment after cleaning
Why do you need to sanitize your brewing equipment?
Cleaning is different from sanitation, and it’s the step that comes after cleaning.
Sanitation is the process of killing living organisms that may cause your beer to taste bad or spoil.
In this way…
You can reduce the growth of bacteria and wild yeast. It’s also a way to make sure beer quality is top-notch!
It’s the same things you clean. So, once you’re done cleaning – sanitizing homebrew equipment is a must on the bottling day!
There are two ways to sanitize your equipment – chemical and heat.
When employing chemical sanitizer…
…the solution is placed in a container, and all of the equipment is soaked in it.
In contrast…
The heat (dry heat or steam) method usually depends on the type of material that you will sanitize.
Sanitizing can be accomplished using dry heat (oven) and steam (autoclave, pressure cooker, or dishwasher).
However…
Oven dry heat is less effective than steam for sanitizing and sterilizing, yet brewers often use it. Dry heat sterilization is best done in your oven.
Get a good sanitizing agent
You’re now done cleaning and doing all the hard work, and now you are in the steps of sanitation.
Similar to cleaning…
There are a few products that you should consider in sanitizing your homebrew equipment.

From the maker of PBW – Star San is an acidic sanitizer manufactured by the same company that produces PBW.
It’s an unflavored, odorless, and no-rinse sanitizer. The foaming action gets into the crack and surface that’s unreachable – eliminating and killing unwanted bacteria and microorganisms.
One of which is called beer stone which generates “off tastes” and shortens the shelf life of beer, and it has the potential to spoil a whole batch of beer.
If left uncontrolled, it may be disastrous for a brewery.
Star San is specially made for the brewing industry to remove scales that form in aging tanks, kegs, and other equipment – that’s why many brewers recommend this.
Here’s how to use Star San.
Per 5 gallons, you can mix one fluid ounce of Star San. You can put it in a spray bottle filled with the same and use it as a spray-on sanitizer.
Moreover…
Iodophor is popular in both the food and medical industry, and it’s also widely used by home brewers for the past years.
Just like Star San…
Iodophor is a no-rinse and very easy-to-use sanitizer. It won’t impart any undesired smell or taste in your beer because it’s flavorless and odorless.
Now…
Boiling, steaming, and dry heating your homebrew equipment will ensure that your materials are free from any contamination. Boiling your worth is an effective way to sanitize your wort chillers.
You can use an oven to sanitize beer bottles and other heat-resistant materials in dry heating.
Here are the time and temperatures required in dry heating for your reference.
- 190°C – 12 to 30 minutes
- 170°C – 1 hour
- 160° – 2 hours
- 150°C – 2 hours and 30 minutes
- 140°C – 3 hours
- 121°C – 12 hours
How to Clean a Fermentor
Whether you decided to use plastic carboys or fermentation buckets…
…you know the best practice of maintaining a clean and sanitized fermentor.
It doesn’t matter how often you brew or what you brew, and it’s important to keep your fermentor clean at all times between batches.
The first step is – of course – cleaning – and it involves the following:
- Rinse it
Before applying anything, rinse your fermentor with hot tap water. You can repeat this step multiple times if the fermentor is dirty.
- Soak it
Use a brewer cleaner such as PBW to soak your fermentor. Use a combination of hot tap water of PBW or OxiClean as a solution and fill your fermentor with it.
Leave it for about an hour or two. Swirl it occasionally – it seems helpful.
After a good soak, rinse it thoroughly.
- Use rag or carboy brush
For glass, you may use a carboy brush.
But what if I’m using plastic?
Carboy brushes may leave scratch marks that are a good hiding spot for bacteria. But here’s a recommended method of using a rag.
Take the rag with a cleaning solution and insert it into your fermentor.
After inserting it, give it a good rock and shake. But, make sure that you put a little liquid on the inside.
Airlocks, lids, and bungs can be cleaned with hot water, and you can also soak them if they’re really dirty.
- Rinse it again.
After removing all the residue and dirt, make sure to rinse it. Use cool tap water for this procedure, and let it dry.
- Then the sanitation.
After cleaning your brewing equipment thoroughly, it’s time to sanitize. Ensure all of the bacteria that may cause an off-taste to your beer.
For this part,
It’s ideal to use no-rinse products such as One-Step, Star San, and Iodophor.
As it suggests – these sanitation materials don’t need any rinsing at all, and it avoids reintroducing germs and bacteria.
- Fill it
Fill your fermentor using the mixture of sanitation products and water (follow the product’s direction).
- Do the shaking
After filling your fermentor with the solution, make sure to shake it properly. Be sure that it comes in contact with all the sides and surfaces of the fermentor.
- Chip in
Insert other brewing equipment that is also needed to be sanitized.
- Leave it
Leave the equipment in contact with the sanitizer for at least 5 minutes or so. You can also refer to the contact time suggested by the manufacturer.
- Drain, don’t rinse
Put aside all the other brewing equipment. Drain your fermentor. And remember – do not rinse, especially if you’re using a no-rinse sanitizer.
Conclusion: How to Sanitize Brewing Equipment
Cleaning and sanitation are crucial parts of making beer.
We don’t want our equipment to harbor bacteria, which will hinder us from sharing a great beer with friends.
Remember that a clean beer is a good beer.
Avoid cutting corners, for it may ruin the next batch of your beer.
A good cleaner and sanitizer will definitely save your brew day.