Bourbon’s name may have come from the old French royal family, but it’s truly our own beloved America’s native spirit.
Not only is bourbon’s flavor complex, but its processes, too.
Its taste’s complex combination of vanilla, caramel, and nuts finished off with a nice smokey overtone sure is interesting enough for many homebrewers to wonder how it can be made at home.
But before anything…
…just know that distilling your own homemade bourbon is way more complicated than beer brewing and requires more specialized equipment and, not to mention, time and effort to successfully complete.
Another thing you may want to consider is the home distilling laws in your state. Generally, distilling at home is illegal, but it also varies by state and area, so be sure to check it out first.
Now, if everything’s ready…
…below are the less-complicated steps in making the Kentucky classic bourbon.
Steps for how to make bourbon whiskey:
Step 1: Determine the mash bill

Unlike beer-brewing, making bourbon is defined by its stricter ratios when it comes to the mash bill.
By the way…
…mash bill refers to the grain profile or recipe of your mix. According to the Federal Standards of Identity for Distilled Spirits, bourbon must be made from at least 51% corn.
That’s right, bourbon is mostly corn. The rest could be up to you, so there’s still some chance to play around with your homemade bourbon recipe ingredients, after all.
The most common cereal grains used in making bourbon are rye, malted barley, and wheat. But these days, quinoa, amaranth, or buckwheat are also becoming more popular options.
If you like your bourbon with a hint of spice…
…rye is the way to go. It lends a bit of a spicy and peppery flavor with an aftertaste that’s comparable to that of a tortilla chip. Heavier whiskeys have more rye in them than other grains.
On the other hand, malted barley gives a bourbon that distinctive smokey, nutty, and often chocolatey flavors, and wheat softens and lightens it all up with its subtle sweetness.
For a homemade bourbon…
…you can start with seven pounds of corn maize. Then 1.5 pounds each of the other grains of your choice.
Tip: If you’re new to this, the recommended combination that you can start with is 75% of corn maize, 15% rye, and 10% barley malt. That would result in the traditional bourbon mash and flavor.
Step 2: Make the bourbon mash.

Start by preparing your grains. The first step is grinding them and then mixing them with water.
Some producers use a hammer mill or a rolling mill. Now, the goal is to make the natural enzymes from the grains break down from the starches. To achieve this, you’d need to grind them three to four times repeatedly.
After this…
…the grains are heated so that the enzymes further break out of the grains. One of these enzymes is called Alpha Amylase. This enzyme is responsible for breaking down the starches in the mash and turning them into sugar.
As you may already know, sugar is vital to any alcoholic drink’s fermentation process.
Among these grains, malted barley is best known for being a good source of Amylase, so it’s also almost never absent in any bourbon mash bill.
So, for the mash…
…corn maize is mixed with water and cooked. Before adding the rest of the grains, make sure to lower the temperature first.
The last grain to be added should be malted barley, and for this, the temperature should be set to the lowest level.
Stir the mixture while waiting for it to approach near boiling point. Use a thermometer to monitor your mash and remove it from the heat just before the boiling point.
The resulting liquid is now a sugary mixture that brewers call wort.
Step 3: Fermenting the mash
Now, this is where bourbon differs from other liquor’s fermentation process. Instead of straining the mash and collecting only the wort, the whole mash is pumped into the fermentation vat.
Yep, all the liquids and the solids.
Then, you will add the distiller’s yeast along with the sour mash.
Sour mash, also called set-back, is simply a residue or a leftover mash from the previous distillation. It got its name from its acidic taste and quality.
Is it necessary?
Well, fermenting bourbon is a tricky game, especially when it comes to balancing the pH of your ferment.
Sour mash helps lower the pH of your mash to keep the growth of bacteria at bay and let the yeast thrive.
You may notice that some bourbon brands still put “sour mash” on their labels. In the beginning, it’s indeed a big selling point. But nowadays, putting sour mash has become a standard practice in producing bourbon that it has become a unique selling proposition to most brands.
But before sour mash…
…hops were often added to help purify the bourbon mash.
After adding the yeast, it’s time to leave your wort and let it ferment. There are several factors that you should consider when fermenting your bourbon.
First is the type of yeast you used. If you’re in a hurry, you can use turbo yeast to let your bourbon ferment faster.
You’d also want to mind the temperature your bourbon will be fermenting in. The warmer it is, the faster the fermentation will take place. If the room is cool, it’ll take longer.
In addition to this…
…the amount of sugar in your ferment can also affect the process. If for some reason, there’s more sugar than what’s normal, then it will also take longer to ferment.
After adding your yeast, you can go back and check it after 18 to 48 hours to make sure that the fermentation has begun.
You should be able to see air pockets or bubbles rising to the airlock. That’s an indication that your yeast is now active and your wort is indeed already fermenting.
What if there are no air bubbles?
That could mean that the fermentation hasn’t taken place. If that’s the case, check the lid of the container and make sure that it’s airtight.
If you don’t see any problem, you can now let your wort sit and ferment for 14 days.
Step 4: Strain the mixture
After two weeks, if no bubbles are coming up on the bubbler anymore, that means that fermentation is pretty much done.
It’s now time to strain the bourbon and finally separate the liquid from the solid. The liquid part is now called ethanol and is used to make bourbon.
Step 5: Collect the bourbon distillate
Now, we’re not through the most complicated stage yet.
After fermentation comes the collection of the distillate. This is unarguably the most crucial stage in bourbon-making, so you must proceed with care and caution.
In case you still don’t know…
…distillation is the process of heating and vaporizing the liquid in order to purify it. While on heat, the liquid that has recondensed from the vapor is then collected into a pot.
This collected liquid is now called distillate, and it’s considered much purer and even more alcoholic than the ferment it came from. All the impurities are left in the liquid that hasn’t evaporated.
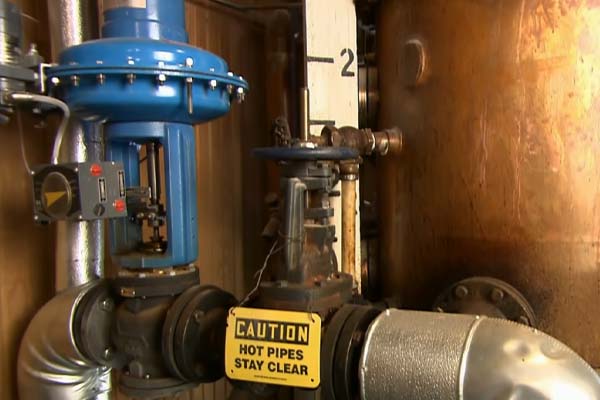
To distill your bourbon, you have to put it in a beer still and heat it up to medium heat. Make sure to tread with caution as the still can get very hot.
The liquid will then evaporate and collect in the pot.
Most bourbons are distilled twice. The second distillation takes place in heated copper pot stills that are usually called thumpers or doublers.
At times, the pot would emit a thumping sound because of the heated steam, hence its name. So don’t panic when it does that!
The primary distillation of bourbon would take its strength up to 50% to 60% abv, and if distilled twice, it would be around 60% to 70% abv.
Some bourbons are even distilled thrice, but it’s optional.
Now, here’s the real challenge.
Collecting the vaporized liquid has four stages, and it takes solid knowledge and even experiences to be able to discern the difference between these stages.
You should also know that this takes a lot of practice, too.
The first stage is called FORESHOTS.
Foreshots refer to the first five percent of your distill and also the first vapors.
Always remember:
Foreshots or the first five percent of the distillation contain methanol which can damage your vision or, worse, make you go blind if consumed. So make sure to discard it immediately.
The next 20 to 30 percent of the distillation is called HEADS.
Now, heads may not be as harmful as Foreshots, but it’s still not meant to be consumed (not like you’d want to!).
Aside from containing compounds such as acetate, acetone, and acetaldehyde, it can also give you a very bad hangover, not to mention its terrible taste and smell of solvent.
Like the Foreshots, Heads should also be discarded.
After the bad stuff, now comes the sweet stuff.
And we call it HEARTS. Hearts is the stuff that you can drink and will, later on, be aged as bourbon.
Detecting where Hearts begin, and end will need your skill as a distiller (or a homemade bourbon maker).
In order to do this…
…you must get down and dirty and taste the distillation. Yes, taste it but don’t swallow it.
If it’s smooth and sweet, with a full flavor, then you’re indeed tasting the Hearts of your bourbon!
Now, if it still doesn’t taste good or still taste and smell like a solvent, then you may not be quite there yet.
Hearts account for 30 percent of your distillation.
After the sweet stuff runs out…
…you’ll now get to the last stage, which is called TAILS.
Tails comprise about 35 percent of the distillation and can easily be recognized by their oily appearance.
Tails contain compounds such as amyl alcohols, propanol, and butanol, so it’s more bitter than sweet. You’ll know that it’s Tails through its oily sheen on the liquid’s surface.
You should take it out and save it for future distillation processes such as feint runs.
After the second distillation…
…you’ll end up with a clear liquid that’s usually called “white dog.”
Some distillers would then bottle this product and sell it as “unaged whisky.”
Step 6: Aging & Barreling

Once the liquid reaches 80 to 125 proof, you’re now left with a moonshine that you can drink.
But if you want the straight bourbon experience…
…you must be a bit more patient and wait for it to age.
According to the American Bourbon Association, it is imperative that a bourbon be aged in a new charred oak barrel.
Most distillers prefer oak barrels that come from the much colder states, such as northern Minnesota, because the colder the climate is, the slower an oak is in its growth. And a slow growth means a tighter grain, which is good for bourbon oak barrels.
But contrary to popular belief…
…other varieties of oak trees can also be used and not just American oaks.
While a majority of distillers still prefer to use the American varieties, more and more are now experimenting with other oaks such as French ones.
In case you’re wondering…
…oaks that are made for bourbon whiskey are split and left to be exposed to the elements for around six months.
This exposure bleaches the tannins out of the wood or that acidic solution that’s present in the wood’s liquid sap. In return, vanillin is developed, which will later add an excellent flavor and characteristic to the bourbon.
After that…
…regulations also require that these oaks be charred. You can choose the degree of your oak’s charr from one being the lightest to four being the deepest.
The burning and toasting of these woods result in the conversion of the starch in the wood into sugar. Not only that, but these sugars are also caramelized in the process, adding more sweetness and flavor to the bourbon whiskey.
Aside from that, it also gives bourbon its signature brownish amber color.
The result is a combination of caramel and vanilla flavors to add to the bourbon’s natural flavor.
In case you might be wondering…
…most bourbon oak casks are handmade, so their sizes definitely vary a little bit. But there’s still a standard size which is 53 gallons or 263 liters with a height of 34 inches or 86 centimeters.
The heads or the top and bottom’s standard size in diameter is 21 inches or 53 centimeters.
There’s also a particular place where these bourbon oaks are stored and aged. It’s called a Rickhouse. You must have already heard about it, especially if you came from the south.
Rickhouses are iconic figures in Kentucky’s landscape.
These houses are strictly controlled by the distillers down to the color of their paints which are usually brown, beige, red, or black.
This is to control the convection of the sun’s heat so that the selected barrels can collect and retain heat in the summer. If done right, the barrels will remain warm even in winter.
Moreover…
…a typical rickhouse could be single-story to ten stories high. The barrels are typically stacked to three barrels on each floor.
These barrels rest on wooden racks or ricks.
Now, here’s the interesting bit…
…temperature plays a big part in the aging and maturation of bourbon. It’s so important that some distillers even use artificial heat to make their bourbons more flavorful.
This is because whenever the temperature is high, the oak woods tend to expand because of their porous nature. As a result, the whiskey seeps and gets absorbed into the wood.
But once the temperature drops, the woods contract again, forcing the whiskey out along with the flavor and color from the wood.
Naturally, cycles such as this occur only four times a year, but many bourbon distilleries today use artificial heat to increase the cycles up to 11 cycles a year.
In case you didn’t know…
…evaporation continues as the whiskey ages in the oak barrel. Usually, the barrels on the top floor are the dry ones as it’s much hotter there.
Because of this, they lose more water than alcohol, so spirits that are aged on the top floor tend to be stronger.
On the other hand…
…the lowest floor is usually cooler and even moist. Because of this, the barrels lose more alcohol than water, so the whiskey also loses strength in the process.
If you want to remember the effects of the different floors in a rickhouse, this analogy called Angel’s Share could help you.
This analogy simply states that because it’s hot and dry on the top-most floor, Angels drink water from the barrels, hence the loss of water through evaporation.
On the other hand, it’s moist and cool on the lowest floor, so the angels drink alcohol to alleviate their rheumatism caused by the cold, thus the evaporation of alcohol.
As for the aging process…
…some bourbons are aged up to three to six months only. But if you want the real bourbon experience, it should be aged for two years. Bourbons that are aged for two years are called straight bourbon.
Other more premium quality ones are even aged for up to six to eight years, which results in a stunningly flavorful bourbon.
Step 7: Dilute
To achieve the proper alcohol content, distillers dilute the distillate with water before and after the aging process.
It’s also preferable to chill the bourbon before bottling to eliminate any long-chain protein molecules along with other impurities which can solidify in the spirit.
These things could cause the bourbon to become hazy if they’re not removed.
By chilling the bourbon…
…it causes the protein to precipitate or solidify, so it’s easier to take them out. You can chill your bourbon down to -2 to -12 degrees celsius.
Distillers use chill-filtration strips to take these proteins out.
On the flip side…
…some say that these filtration strips also take out the smooth and nice mouth-feel of bourbon that’s caused by fatty acids. This is the reason why some bourbons proudly display on their labels that they didn’t use chill-filtration strips at all.
Step 8: Bottle
After aging, diluting, and chilling your bourbon. Once bottled, your bourbon will then stop aging. Now you have the final product.