Every beer enthusiast has wondered at some point in their lives how to brew beer at home. However, how much of your time will this endeavor take? The answer is, not that much.
To make your first small batch of homemade brew, you need a brewing kit. The brewing kit contains the essential items required for beer making.
After assembling a beer making kit, the next item on the list is patience. If you are on a tight schedule, you can still complete this process.
So exactly how long does it take to brew beer at home? Let’s find out step by step.![]()

Prepare the Brewing Equipment
Time: 45 minutes
The first step is to acquire the correct brewing equipment. The essential items include the following:
- Brew pot
- Fermenting vessel
- Sanitizing equipment
Those three items will produce a decent yield of beer. However, if you want a better-quality yield faster, there is additional equipment. They include:
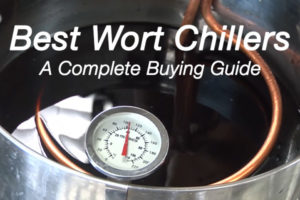
- Wort Chiller
- Hydrometer

A hydrometer is used to monitor the rate of fermentation to make sure that it is not terminated prematurely. Whenever fermentation stops too soon, yeast activity will still be evident in the resulting product.
On the other hand, a wort chiller dramatically cuts down preparation time. It lowers the time it takes to cool the wort after boiling.
On its own, the wort takes about five hours to cool to a warm temperature. If you use a wort chiller, the cooling time reduces to at most, half an hour.
As you prepare the brewing equipment, it is pertinent to clean everything. Sanitizing gear is the most effective way of doing this.
The reason you need to sanitize the brewing equipment is to eliminate the risk of infections. Unsanitized equipment has an adverse effect on the aroma of the beer. It will make the smell unpleasant.
The total time for setting up and sanitizing beer brewing equipment is no longer than 45 minutes.
Boiling
Time: It depends on the recipe used. Boiling generally takes between 1 and 4 hours.
There is a pre-boiling phase for some beer recipes. The amount of time required for this phase solely depends on the recipe that you are following.
For example:
- Steeping grains is a process that enhances the color and flavor of the brew. It takes 45 minutes to complete.
- An all-grain beer recipe requires mashing before boiling. This process takes an hour and a half.
Next, for the boiling itself, just fill up a kettle of water and heat for an hour. If you are making Pilsner malt beer, boil for 90 minutes.
Note: Each beer recipe will specify how long you pre-boil and boil your mixture.
Cool the Wort
Time: 5 hours cooling on its own or 25 minutes with a wort chiller.
The wort is the result you get from boiling all the ingredients from step two. The wort needs to cool as fast as possible.
Just after you complete the boiling time, the temperature of the wort should be 212° F.
You need to lower the temperature from 212° F to at least a temperature of 75° F. Pitch the yeast in at this temperature.
A wort chiller lowers the temperature with the speed required. Without one, you have to come up with another way of cooling the brew quickly.
- Fill a kitchen sink or bathtub with ice and stick in the pot. Keep adding icy water and more ice cubes at intervals. Doing this will speed the process further.
- Alternatively, seal the boiling pot in snowing weather or freezing cold and then wait for it to cool down.
Be careful not to expose the wort to outside air or particles. This is why the pot is tightly sealed if you are cooling it outside.
Fill and Pitch Yeast
Time: 20 minutes
This step is the only time that you should expose the wort to air. Aerating introduces oxygen into the mixture. This oxygen is necessary for the yeast to ferment.
Exposing the brew mix to air at any other time before step 4 will destroy it. Premature aeration causes the brew to oxidize.
- Once the wort cools, transfer it to a fermentor or a carboy using a funnel. This is also the time to introduce some air into the funnel.
- To add some air, swish or shake the fermentor as you pour in more brew. You can also stir the brew once it is in the fermentor.
- In addition, there are now aerating devices that aerate brew pots quickly.
After you have poured all liquid into a fermentor/ carboy, proceed and the yeast next. There are two kinds of yeast used for beer:
- Bottom-fermenting yeast
- Top-fermenting yeast
The kind of yeast you use depends on the type of beer you are making. The type and amount of yeast used will be explained in the recipe.
Once you are through with aeration and pitching yeast, create an airlock. Secure the fermentor’s lid and place it in a dark but cool place.
Avoid areas of the house that fluctuate in temperature, whether too hot or too cold. The place you choose must be shielded from sunlight.
Fermentation Process
Time: 2 weeks
This is the part that creates the final product as we know it, needless to say, it is the most important step.
Follow everything in your recipe to the letter. On day 10, inspect the hydrometer. Take readings every day from the tenth day until there is no change in-activity.
When the reading stays unchanged over a couple of days, it means that the fermentation process is over.
Bottling
Time: 4 weeks for carbonating
For fermenting if you want your beer to go to bottles immediately after, add priming sugar into a priming bucket. Priming sugar allows the beer to carbonate in the bottles.
If a recipe specifies how you should add priming sugar, follow it exactly as it describes.
Otherwise, the following the general method of carbonating beer:
- Put sugar in the priming bucket.
- Connect the fermentor or carboy to the priming bucket via racking cane and tubes.
- Mix the beer and sugar. This is called priming.
- When done mixing, attach a bottle filler to a tube and fill the bottles.
- Place the bottles in a cool and dark place for five weeks to allow carbonation to take place.
Priming is not necessary if you are using a kegerator to keg the beer. The kegerator will cause carbonation on its own.
Conclusion
The combined time spent actually brewing your beer is less than six hours, so don’t be afraid to tackle this project. After that, you pretty much have to let nature take its course. With this in mind, go forth and brew some beer.
Product Advertising API - Last Updated on 2025-07-10. DISCLAIMER: Some or all of the product links on this page are affiliate links. The operator of this website received a small commission if you purchase products through these links, HOWEVER, there is no added cost to you. These commissions help to fund the operation of this BDMetrics.com